Growing peppers from seed requires a certain amount of patience. The willingness to dedicate time to nurture that seedling, and care for it as it matures, can reward you with amazing fruits. Growing peppers from seed requires a certain amount of patience. The willingness to dedicate time to nurture that seedling, and care for it as it matures, can reward you with amazing fruits.
Getting started: timing, varieties, and seeds
When I first started growing, I recall researching all over the web for info on how to get started. Everyone has different methods, some just too complicated for me. Peppers are easy to grow, and I keep it very simple. After several seasons of growing hot peppers, and testing many of the tips I found all over the web, I present the step by step of what has worked best for me.
I don’t have a greenhouse and I only grow a handful of different pepper plants each year, like 5 - 10. I also don’t have garden space, so all my plants grow in containers outdoors once they are ready and it’s warm enough outside. So let’s get growing!
When to start your seeds
Generally, you start your seeds in the winter indoors. Exactly which month you’d like to start is up to you, but November - February is a good starting point. I’ve always started my seeds in January. November and December have too much holiday travel, gift buying and work going on for me to focus on my peppers, so January works for me.
What are the easiest peppers to grow?
If you don’t want to wait too long for germination, Capsicum Annuum are probably the easiest to grow. These include jalapeños, serranos, cayennes, Thai peppers, Anaheim, Hatch, poblano, many ornamentals and more. They also do better in cooler climates and germinate readily even at lower temperatures (50oF -75oF). Chinense species, which include the super hots, habaneros, scotch bonnets, etc., tend to have slower germination times and higher soil temperature requirements (75oF-90oF). Just keep in mind that the germination process can be slow and irregular as the degree of dormancy varies considerably between species.
How long does it take for the seeds to sprout?
Most pepper seeds sprout in about a week at a temperature of 70-80 degrees F., but germination can be spotty depending on the variety. Super Hots can take longer to sprout, sometimes up to 6 weeks.
Where do I get seeds?
You can buy seeds from your local garden center, from online seed suppliers, or simply purchase your favorite peppers from your local supermarket and scrape out the seeds. Good to go. A couple of favorites are Baker Creek Heirloom Seeds and pepperjoe.com.
From seeds to sprouts: indoor germination and early care
You are going to start your seeds indoors. Before you plant your seeds, soak them overnight in warm water. I’ve grown seeds with and without soaking, and I found the ones I soaked did a better job of sprouting. So I pop the seeds in shot glasses with warm water overnight and then plant in the morning. You will be planting 3 seeds in each ‘pod’. Only one of these three seeds will become the producing plant, so don’t get attached.
Just because your seeds sprout, this does not guarantee they will all survive to become healthy plants. To ensure you grow at least one strong producing plant of each variety, plant a minimum of 6 seeds or more. Now we’re ready to get the seeds into some soil. I’ve had the best results using Jiffy peat pellets. They come with the greenhouse dome, which is great for getting seeds to sprout quickly in a normal home environment in the winter. Follow the instructions on the Jiffy box. You simply pour water onto the pellets and then give them some time to absorb the water. The pellets will fully expand after several minutes.
Once the pellets are ready, pull back the mesh on the top and dig about a 1/4″ deep hole. Place 3 of the same seeds into the soil and very loosely cover with soil. Don’t pat down the soil. You want to make it as easy as possible for the seedlings to breakthrough. Additional Soil Boosters: Myco Blast is a soil additive I use at this point. I add Myco Blast to the seed pods right after planting and water once a week with it until the first set of true leaves appear. Myco Blast naturally enriches the soil producing stronger healthier seedlings.
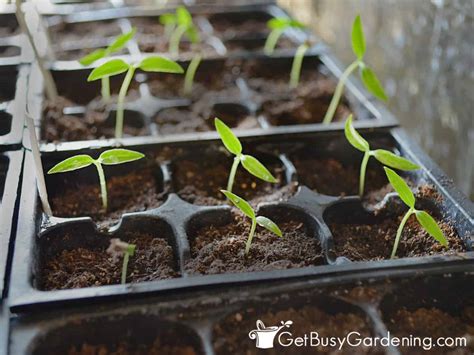
Chile seeds require moisture and warmth to break their dormancy. I place my seed trays on a Seedling Heat Mat to help with the germination process. It warms up the soil and I’ve found that my plants sprout far faster with the use of a heating mat. Once the first seeds start to sprout remove the greenhouse dome and start to make sure the seedlings have enough sunlight. I keep my seedlings under a well-lit window all day, but since they sprouted in the winter months I add a simple grow light which I turn on once the sun goes down. The light is kept close and the seedlings are kept moist but not wet.
The first leaves that sprout are cotyledons; the next set are the true leaves. I transplant each into larger cups once they are about 3″ with their first set of true leaves. For transplanting, use plastic cups with drainage holes. If seedlings are in peat pots, remove the mesh lining and plant the root ball into the soil. Plant slightly deeper to promote more root growth, with the top of the plant about 1/2″ below the cup top to protect from the elements during hardening off.
Soil, pots, and fertilization
What kind of potting soil should you use? Potting mix is designed for containers and provides drainage and airflow. Garden soil is appropriate for in-ground planting. I typically use Kellogg Patio Plus for container-grown peppers. For feeding, after the first true leaves appear, you can start fertilizing with a diluted fish emulsion or fish and kelp fertilizer at 1/4 strength. If you have pets, keep them away from fish fertilizer smells. Foliar feeding: when the plant has three or four sets of true leaves, apply magnesium sulfate (Epsom salt) to leaves and stems to keep foliage strong and prevent light green to yellow leaves. Use 1 teaspoon per gallon of water, spritz every other week against the schedule of fish emulsion feeding.
Additional Soil Boosters include Myco Blast again and Soil Blast to enrich soil with beneficial bacteria. For the next month, water, fertilize, and keep plants healthy while you harden them off for outdoor life. Hardening off gradually acclimates plants to outdoor conditions over a couple of weeks. Start with 1/2 hour outside, then increase to longer periods, and finally keep them out overnight if there is no risk of frost.
Transplanting outdoors and container options
When is a good time to transplant your plants? Peppers should be 6-10 weeks old with dark green color and thick stems, with no blooms. After the last frost date and nighttime temps above 50° F, you can transplant. Peppers enjoy 70-80° F days and 60-70° F nights. For containers, I favor EarthBox systems for larger peppers, but regular pots work well for smaller varieties. If reusing pots, sterilize to prevent disease transfer: soak in a 1:9 bleach-to-water solution for 10-20 minutes, then rinse.
Planting and spacing: Dig holes slightly larger than the root ball, plant at the same depth or a bit deeper, and water thoroughly. Pepper roots are shallow and brittle, so staking or caging can help once they grow taller. You can mix compost into the soil for better results. My peppers live in containers: 4 peppers per EarthBox is a typical setup for me, with some varieties larger and others compact.
Care after transplanting
Watering is crucial: peppers like well-draining soil and consistent moisture. Water deeply and regularly, especially in containers. Mulch helps lock in moisture. Fertilize with organic tomato fertilizer or a high-potassium fertilizer once plants begin to form buds, and consider a balanced or low-nitrogen slow-release fertilizer for bell peppers. Pinch growing points when peppers are about 8 inches tall to encourage bushier growth and more fruit.
Pepper production, growth issues, and harvest
Please note that peppers can be sensitive to heat: temperatures above 85-90°F can cause blossom drop, and cold nights below 60°F can also stress plants. Use shade cloth in hot weather or cloches in cold snaps as needed. Begin harvesting bell peppers once fruiting begins and peppers reach usable size; green peppers can be harvested, or wait for color maturation to red, orange, yellow, or purple depending on the variety. Regular harvesting encourages new fruiting and keeps plants productive. To harvest, cut stems with clean pruners rather than pulling to avoid damage.
Storage: bell peppers stay fresh in the crisper drawer for up to 10 days. Common problems include blossom drop, blossom end rot from calcium or irregular watering, sunscald from excessive sun, and yellowing leaves from overwatering or disease. Pests such as aphids, slugs, snails, and spider mites may require organic soap sprays, slug traps, or increased watering. Deer may be deterred with deterrent plants or motion-activated sprinklers.
Interesting anomaly: peppers inside peppers
We received an intriguing surprise the other night: a small pepper inside a bell pepper. This is parthenocarpy, or fruit formation without fertilization, sometimes termed internal proliferation. Some genetic lines of peppers are more prone to aberrant ovules, producing mini peppers or tissue-like growths inside. While not desirable in commercial production, it’s an interesting reminder of pepper biology; the inner fruit is typically seedless, and many people still enjoy eating both the outer pepper and the interior fruit.
Regardless of the cause, growing peppers at home remains an easy and colorful addition to your garden or patio. When to Plant Peppers and Where to Plant Peppers have practical implications for your urban garden. Peppers are slow-growing but can be rewarding with proper indoor beginnings and careful outdoors integration.
Peppers are full sun plants that should be planted in a well-draining spot that receives at least 6 hours of light per day and has rich and moist soil. Mixing some compost into the soil before planting will help peppers grow better, while northern gardeners may want to warm the soil with black plastic for a few weeks before planting to speed up planting times. You can also grow peppers in a well-draining pot that’s at least 3 to 5-gallons in size.
To start peppers indoors: Plant 2 pepper seeds per seedling cell or 3 per pot by burying the seeds 1/4-inch deep in seed starting mix. For faster germination, maintain soil at 70°F (21°C) or above with a heat mat. Move the seeds under bright grow lights, keep them well-watered until they sprout, thin out the weakest seedlings with fingernail scissors leaving just 1 plant per cell or 2 per pot, and repot the seedlings into bigger containers as needed until it’s time to move them outdoors.
To plant peppers outside: Wait until the weather warms and then harden indoor started plants or nursery starts over the course of 1 to 2 weeks. Plant the seedlings in prepared soil at the same depth they were growing in their nursery pots or slightly deeper if their stems are leggy by burying the stems to the lowest set of leaves. Watering should be regular, and mulching helps retain moisture. Pepper fruits typically mature in about 60 to 90 days from transplant, depending on variety and conditions.
Harvesting and post-harvest care
When to Harvest: Begin harvesting peppers as soon as fruits reach usable size. Regular harvesting encourages more fruit production and can improve sweetness in some varieties as they stay longer on the plant. How to Harvest: Hold the stem and cut with clean pruners or scissors; avoid pulling the pepper off to prevent damage. Storage: peppers stay fresh for up to 10 days in the crisper drawer, depending on variety and storage conditions.
FAQ: indoor peppers and general care
- How long does it take for indoor peppers to mature? Generally around 70-90 days from germination to harvest, with variation by variety.
- Do I need to hand-pollinate indoor pepper plants? They are self-pollinating, but you can assist with gentle shaking or a small brush if fruit set is poor.
- How much space do indoor pepper plants require? About 18-24 inches apart to allow for air circulation.
- How to prevent tall, spindly plants? Ensure adequate light and rotate plants toward the light source every few days.