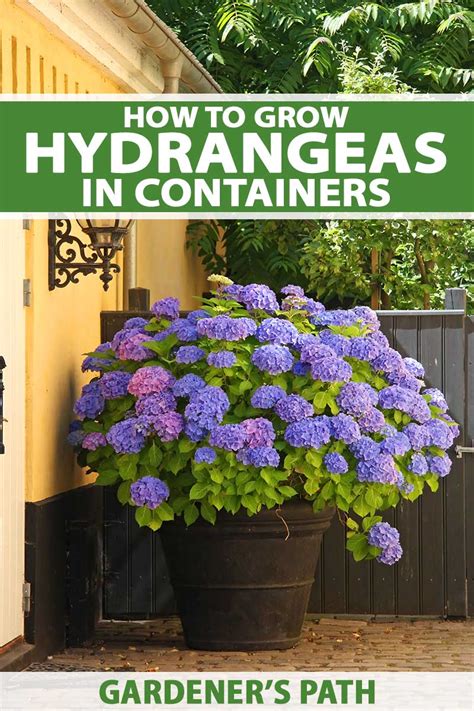
When you think of hydrangeas, you think of statement hedges and elegant outdoor gardens featuring large mophead flowers in vibrant colors. But this superstar shrub isn't just reserved for the garden; hydrangeas can thrive in containers too! From porches to patios, container gardening brings the vibrant and captivating beauty of hydrangeas right to your doorstep. Here we'll discuss the do's and don'ts you need to consider to grow hydrangeas in pots and containers.
Choosing the right location and containers
For your hydrangeas to flourish, the container must be placed in a location receiving at least part sun (4-6 hours) or full sun (+6 hours) per day. If you live in warmer regions where temperatures soar during the peak season, potted hydrangeas could benefit from some shade in the afternoon to keep the soil wet. Luckily, pots and containers allow for the mobility of your hydrangeas, meaning you can adjust the location throughout the season!
When you search for the perfect container that aligns with your style, consider choosing a weatherproof material that helps withstand the outdoor elements. Hydrangeas cannot be grown indoors in normal household conditions successfully in winter, so they must stay outdoors. Therefore, the container must be made of a material that won't break or flake apart from exposure to freeze-thaw cycles.
Planting in pots: how to get started
Once you've determined your location, it's time to put your hydrangeas in their container; how exciting! When placing your hydrangeas in your pot, leave a good 1-2" between the top of the soil and the rim of the container. This leaves space for water to flow when you water or it rains without losing the soil.
Take cuttings in early summer. Select a healthy, non-flowering stem and cut a 4- to 6-inch section just below a leaf node. Remove the lower leaves and trim the remaining leaves in half to reduce moisture loss. Dip the cut end in rooting hormone, like Root Starter Gel. Plant in moist potting mix. Insert the cutting about two inches deep, firm the mix around it, and cover with a clear plastic bag or dome to create humidity. Keep the cutting in bright, indirect light and mist regularly. Roots typically develop in three to four weeks. Once your hydrangeas are blooming beautifully, you'll want to bring some of that beauty indoors or preserve blooms for dried arrangements.
Hydrangeas drink heavily (their name literally references water), so correct watering makes a real difference in plant health. Check the top 2 inches of soil. When it feels dry, it's time to water. Established hydrangea plants usually need about an inch of water weekly. Water deeply at the base once or twice per week, soaking the root zone rather than just wetting the surface. During hot spells, you may need to water every other day. Mulch generously. Providing the right nutrients at the right time encourages vigorous growth and showstopping flower clusters. A slow-release formula, like Shake ‘n Feed Flowering Trees & Shrubs, works especially well because it delivers a steady supply of nutrition over several months. Feed in early spring as new growth emerges and again just before summer.
Soil, pH, and fertilizer considerations
Generally fertile; moist; well-drained soil. They appreciate afternoon shade especially in hot climates. The commercial growers in Holland produce them in greenhouses. They would be quite happy in a high tunnel or under a shade structure in summer. Soil pH for blue blooms is different from pink blooms; for bigleaf (Mophead) and mountain hydrangeas, blue blooms occur when soil pH sits between 5.2 and 5.5, while pink blooms appear at pH 6.0 to 6.5. A soil pH in between often produces purple or muddled blends of both. If you want blue blooms, work in soil sulfur or an aluminum sulfate amendment; for pink, add garden lime to raise the pH. White-blooming types like panicle and oakleaf hydrangeas stay white no matter the pH but prefer a pH between 6.0 and 7.0.
Mulching will cut back on watering needs, keep weeds at bay, and protect your plant in extreme temperatures. Exercise caution when selecting mulch because some varieties may change color based on soil acidity or alkalinity. A mistake many people make with their hydrangeas is over-fertilizing. This puts too much nitrogen in the ground and can cause your hydrangeas to stop blooming.
Pruning and care: keeping blooms coming
First, figure out what type of hydrangea you’re growing. Bigleaf, mountain, and oakleaf hydrangeas bloom on "old wood" (stems from the previous year), while panicle and smooth (Annabelle-type) hydrangeas bloom on "new wood" (the current season's growth). Some newer reblooming varieties flower on both. If your hydrangea blooms on old wood, prune it right after the flowers fade in midsummer. If it blooms on new wood, prune after flowering or in late winter as appropriate for the variety. Deadheading spent flower heads encourages certain hydrangea types to redirect energy into new blooms rather than seed production.
In pots, propagate and prune carefully. When pruning, use clean, sharp pruners and make cuts at 45-degree angles facing upwards to promote new growth. For example, prune stems just below the clusters of faded flowers, and cut older or dead canes back to the ground. Old-wood bloomers should be pruned right after they finish flowering in midsummer. Reblooming or Endless Blooming types tend to be compact and may not require annual pruning; deadheading can be done to maintain a tidy appearance.
Common problems and solutions
Healthy hydrangeas fend off most problems on their own, but even well-tended shrubs can face pest or disease pressure. Aphids, scales, nematodes, and mites may be seen but are rarely a problem; a strong blast of water can knock many pests off. Root rot caused by waterlogged soil presents as yellowing, wilting leaves even when the ground is wet; prevention through good drainage and proper watering is key.
Seasonal issues also include cold snaps, which can damage buds on old-wood varieties. The newer reblooming varieties help mitigate this risk by blooming on new growth, but proper pruning timing remains crucial for next year's blooms.
Care for cutting, drying, and displaying
Once your hydrangeas are blooming beautifully, you may want to bring some indoors or preserve blooms for dried arrangements. Cut stems early in the morning when blooms are fully open and hydrated. For drying, harvest in late summer to early fall when blooms feel slightly papery. Strip the leaves from the stems, bundle several stems together, and hang upside down in a warm, well-ventilated spot away from direct sunlight. Allow two to three weeks for drying, then display in arrangements that hold their shape and color well.
Harvesting and processing hydrangeas properly ensures long-lasting dried arrangements and preserves the beauty of your garden into the cooler months.
Types and varieties: quick guide
Common types include:
- Bigleaf Hydrangea (H. macrophylla): Mophead and lacecap, color depends on soil pH; blue flowers at acidic pH, pink at alkaline.
- Panicle Hydrangea (H. paniculata): Cone-shaped clusters, white to pink with age, hardy and blooms on new wood.
- Smooth Hydrangea (H. arborescens): Known for large white clusters like 'Annabelle', blooms on new wood.
- Oakleaf Hydrangea (H. quercifolia): Oak-shaped foliage, white panicles, blooms on old wood.
- Climbing Hydrangea (H. petiolaris): Vining species with fragrant white flowers.
Some varieties are more cold-hardy than others, and you can grow many hydrangeas in USDA zones five through nine, with some extending to zone eleven. If a desired variety is not cold-hardy enough for your zone, consider growing it in a container and bringing it indoors during colder months.
Propagation: growing new plants
With proper timing and basic propagation techniques, you can grow new hydrangeas from simple stem cuttings. Softwood cuttings rooted in late spring to early summer tend to root quickly and yield better results than hardwood cuttings, which are slower and more challenging. Rooting hormone can help, and maintaining high humidity accelerates rooting. In most regions, softwood cuttings should root in two to four weeks with proper care.
With practice, you can propagate hydrangeas from stem cuttings and share new plants with friends and family, expanding your hydrangea collection without purchasing new stock.
Choosing and caring for containers
Growing hydrangeas in pots is a great option if you're short on yard space or want to move plants for seasonal sun and shade. Choose a container at least 18 to 24 inches in diameter with plenty of drainage holes. Fill it with a quality moisture-control potting mix to help maintain consistent soil moisture. Potted hydrangeas need four to six hours of sun daily; morning light with afternoon shade works best in warmer climates. Water more frequently than you would in-ground plants, since containers dry out faster.
- Dig a hole twice as wide as the root mass and just as deep when planting in-ground, but for containers ensure the pot is well-drained and sized for future growth.
- Place the plant so the top of the root ball is level with the surrounding soil surface and backfill gently.
- Mulch to hold soil moisture and protect roots from temperature swings.
Storage, arrival, and handling
Some sections mention that plants shipped to you from growers may arrive in dormancy. They may show swelling buds or new growth but look dead; don't worry, they will wake up. If you can't plant immediately on arrival, store bare roots in the cooler to delay growth, and avoid freezing. Plant within a few days of arrival for best results.
Practical quick-start recap
To summarize, grow hydrangeas successfully by picking the right type for your zone, ensuring proper sun exposure and moisture, using well-draining soil, and pruning at the correct time for your variety. In containers, monitor soil moisture closely and water regularly, especially in hot weather, while providing morning sun and afternoon shade when needed. With careful care, hydrangeas reward you with lush blooms and long-lasting beauty.