Growing plants indoors can be transformed by a purpose-built shelf with integrated grow lights. This guide compiles practical, tested ideas from real setups to help you create a sturdy, adjustable, and efficient grow-light stand that fits your space and plant needs.
Choosing the shelf framework and layout
There are no limits to options with LED light tapes, and open shelves improve airflow, reducing mold concerns on humidity-loving plants. Open shelves also allow easy customization and airflow, which helps keep plants healthy. A metal wire multi-tier utility shelf provides a strong, easy-to-hang framework, while wooden shelves can be drilled for secure light attachment. You’ll want to plan the layout so the power adaptor wire and shelf-to-shelf connections stay on the backside for a clean look and safer operation.
Start with a shelving unit that fits your space and can accommodate the height of your eventual light fixtures. A 5-tier stand with 30” x 14” shelves is a common, compact solution that can hold multiple trays of seedlings. If you’re aiming for portability or easy storage, consider shelves that can be disassembled or reconfigured as your plants grow.
Choosing the lighting: LED strips vs. fluorescent
LED lights offer a full-spectrum, low-heat solution ideal for indoor seedlings and houseplants. Unlike traditional fluorescent shop lights, LED strips stay bright and consistent for years without frequent replacements, and they generate less heat, decreasing leaf burn risk. Red and blue light spectrums are most beneficial for plants, with blue supporting leaf growth and red promoting flowering. A daylight LED tape in the 5000-6000K range provides a good balance for a wide variety of plants.
Fluorescent lights can be effective but tend to produce more heat and require more frequent replacement or adjusting to maintain intensity. If you choose shop-light fixtures, pairing a warm (e.g., 3000K) and a cool (e.g., 6500K) T8 bulb in each fixture creates a broad spectrum. However, LED strips are often more space-efficient and safer in humid indoor environments.
Two rows of lights per shelf are typically enough for many seedlings, but assess your specific plant needs. With LEDs, you can adjust brightness with dimmers or remotes, enabling customized light levels for different shelves or plant types.
How to install LED grow lights on a shelf
Attach LED light strips to the underside of each shelf to maximize light delivery directly to the plant trays and minimize vertical space usage. Coroplast (corrugated plastic) can be placed beneath the shelves to direct light downward and cover wires. If you’re new to wiring, DIY soldering is doable and can provide a clean, reliable connection, though quick-connectors are an alternative.
Plan to run lights in two or more strings, so you can independently control brightness on different shelves. Use a digital wall timer or a power strip with an integrated timer to automate on/off cycles. Start seedlings with 8 hours of light per day and gradually increase to 12 hours as they establish roots and growth accelerates.
Wiring and safety considerations
Two complete light strings, each with its own power supply and dimmer, give you flexibility to tailor light intensity per shelf. When wiring, keep all connections behind the shelves, and avoid running power cords across walkways. If you’re new to soldering, watch an introductory tutorial and use proper insulation and moisture protection to reduce risk. A low-voltage AC adaptor minimizes shock risk during setup and maintenance.
Secure shelves to the wall for safety, especially if you’re mounting lights overhead. Use wall anchors where needed and ensure the system remains stable even when shelves are loaded with trays and pots. S-Biner hooks can help suspend lights from wire shelving, and you’ll need a corresponding number of hooks per fixture to maintain an even, sturdy setup.
Managing heat, moisture, and plant health
LEDs emit less heat than fluorescent bulbs, reducing leaf scorch risk and water droplet damage on leaves. If heat becomes a concern, separate heat sources or invert light placement to maintain optimal temperatures. For humidity-loving plants, open shelves promote airflow and reduce mold risks compared with closed setups.
Monitor plant responses: leggy seedlings indicate insufficient light, while overly intense light can cause leaf burn. Adjust light proximity gradually, and consider pairing light height with plant growth using adjustable shelving. A heat mat under seed trays is optional but beneficial for germination of heat-loving seeds like peppers, provided you also monitor temperature with a thermostat.
Sample configuration and workflows
Assemble the shelving unit first, then mount ceiling hooks if you plan to run fixtures from above. Install two shop-light fixtures on two shelves, with alternating warm and cool bulbs to achieve a balanced spectrum. Place a plastic dome over seedlings if you want to maintain humidity, and position lights about 2 inches above the dome for compact growth. Use a timer to automate cycles, and adjust light intensity using dimmers attached to each shelf.
For layout efficiency, create two complete strings of lights with two power supplies and two dimmers, placing the top shelves closer to higher-light-demand plants and the lower shelves at lower intensities. You can also use a heat mat with an independent thermostat on a chosen shelf to assist seed germination when ambient room temperatures are cooler.
Putting it all together: a practical setup plan
Step-by-step outline to replicate a compact, efficient system:
- Assemble the shelving unit and secure it to the wall for stability. Install ceiling hooks if you’ll suspend lights from above.
- Install two shop-light fixtures on two shelves and insert one warm and one cool T8 bulb into each fixture. Test before mounting.
- Attach LED light strips to the underside of each shelf and cover wires with Coroplast to direct light downwards.
- Wire lights in two strings, soldering connections or using quick connectors as preferred. Attach dimmers and a timer to control brightness and duration.
- Set initial seed lighting to 8 hours per day, then adjust to 12 hours as plants establish. Raise lights gradually as seedlings grow to maintain the right distance.
- Place heat mats under selected trays as needed, and use a thermostat to regulate heat for germinating seeds.
- Monitor plant growth, adjust brightness per shelf, and re-pot leggy plants to deeper containers if needed.
- Consider reconfiguring shelves to maximize airflow and light exposure as plants mature or as you add new trays.
Scale and cost considerations (example)
- A 5-tier, 2’x4’ grow system can handle multiple trays and tiers, with total costs varying by components but often notably cheaper than commercial systems.
- Two complete light strings, dimmers, a timer, and a heat mat can be integrated into a single setup, with scalable options to add more shelves or fixtures as needed.
- Open, modular systems allow customization to fit different room layouts, plant types, and growth stages.
Practical tips and common questions
What about purple grow lights? They can look bright but aren’t necessary for most houseplant setups and may be less comfortable for living spaces. The general consensus is that a red+blue spectrum provided by standard LEDs is sufficient for most plants, with 4000-6500K color temperature offering broad-spectrum coverage.
How far should LED grow lights be from plants? A common starting point is around 2 inches for compact setups and increasing gradually as seedlings grow. For larger setups, maintain a close distance to prevent leggy growth, but avoid leaf burn by monitoring plant responses.
How many grow lights do you need? Aim for two lights per 11” x 22” tray to ensure even coverage across all seedlings. Adjust based on plant species and tray arrangement. You can add more rows of lights to increase intensity and light distribution as needed.
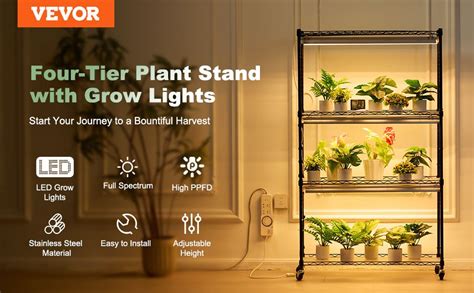
Grow Light Shelf Setup - Seed Starting Setup for Small Spaces
With careful planning, a grow-light shelf becomes a versatile indoor greenhouse that fits a wide range of spaces, from small closets to larger rooms. The key is balancing light quality, intensity, height adjustability, airflow, and safety to create a thriving environment for seeds, seedlings, and houseplants alike.