The thick foliage and fragrant wood of this tree make it a popular choice for landscapers and gardeners. In this extensive guide I’ll provide step-by-step instructions, advice, and my own experience growing Eastern Red Cedar from seeds. The Cupressaceae family of cypresses includes Eastern Red Cedar, notable for its dark green to blue-green foliage and tiny berry-like cones with a conical shape that set this tree apart. My Personal Experiences with Eastern Red Cedar illustrate selecting the best seeds, nurturing young seedlings, and the overall process that has been instructive.
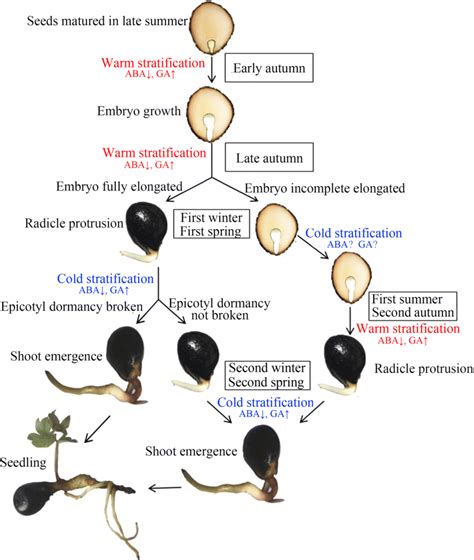
Making the Right Seed Choice is foundational. Fresh seeds, typically harvested in late autumn from mature trees, have the highest germination rates. To break dormancy and encourage germination, Eastern Red Cedar seeds require stratification, a form of cold treatment. I prepared my seeds as follows: cleaning the seeds to remove pulp or debris to inhibit mold during stratification. Using a sealed plastic bag with a moist medium (sand or peat moss), I placed the cleaned seeds for cold stratification in a refrigerator at 35 to 40°F (1-4°C) for approximately 60 to 90 days to simulate the cold natural habitat that the seeds would experience in the wild. After stratification, it was time to plant the seeds.
Soil preparation and sowing are crucial. I prepared the soil with a potting mix that has high organic matter content and drains well. Sowing the seeds involved burying them in ready-made trays, covering them just a quarter of an inch deep with soil. Maintaining consistently damp but not soggy soil is essential for effective germination; I regularly misted the soil with a spray bottle. When choosing a location, keep in mind that Eastern Red Cedars prefer full sun and well-drained soil, and I ensured there was no competing vegetation. Planting the seedlings at the same depth as they were in the trays allowed them to establish more quickly, and mulch at the base helped retain moisture and suppress weeds.
Long-Term Maintenance is essential for healthy growth. In the first year, especially during dry spells, I offered a thorough soak once a week. Although well-established trees can resist drought, occasional intensive irrigation is beneficial. Mulching around the base maintained soil moisture content and temperature. I also focused on removing dead or broken branches and shaping the tree as desired. The benefits of Eastern Red Cedar are numerous, including ecological advantages and practical uses of wood and foliage. Its dense growth, ecological benefits, and historical significance make it a valuable species for landscapes and cultural contexts alike.
Eastern Red Cedar offers ecological advantages, such as erosion control due to its extensive root system that stabilizes soil. The wood’s properties-longevity and decay resistance, as well as natural moth-repelling qualities-make it valuable for furniture, fence posts, and cedar chests. It also provides habitat for birds and small mammals, with berries serving as a food source and dense foliage offering cover and nesting sites. Historically, the tree is noted as an important resource in various cultures and traditions, underscoring its significance beyond ornamental use.
Soil Conditions and Techniques for Establishing are important for healthy growth. Before planting, I measured soil pH with a simple test kit to determine adjustments if necessary. To improve drainage, I amended the soil with sand and organic matter. For planting techniques, I dug a hole twice as big and twice as deep as the root ball, ensured the root collar was level to prevent root rot, and watered thoroughly after planting. During the first growing season, I watered weekly, and gradually reduced irrigation as trees matured. Though Eastern Red Cedars generally do not require fertilization, they can benefit from a balanced, slow-release fertilizer in early spring to promote new growth.
Pruning and upkeep are part of long-term care. In late winter or early spring, I pruned to maintain the tree’s natural shape, removing overly dense growth. Pest and illness management included addressing common issues such as bagworms and spider mites with natural remedies like neem oil and insecticidal soap to minimize environmental impact. For propagation, seeds remain the primary method, but cuttings can be used for vegetative propagation. Seed collection involves harvesting fully developed cones in the fall, with stratification and then sowing in a well-draining mix under warm, sunny conditions. Some growers also explore seed trays and early transplant strategies for efficiency, especially when germinating large batches, though methods vary with climate and resources.
Careful observation and patience are essential. Seed collection often involves noting cone maturity and the onset of cone opening, which signals when seeds can be extracted or collected from fallen cones. The germination process benefits from fresh seed and proper stratification; sowing in autumn, outdoors after the last frost date, or in trays with cold exposure can mimic natural conditions and improve success. In temperate climates, a combination of outdoor sowing and cold stratification can be particularly effective, particularly when seeds are sown in trays that stay moist and well-drained.
Frequently Asked Questions address practical timing and methods. For example, stratification involves keeping seeds moist but not soaked, and the duration for germination is influenced by climate and seed quality. Gardening is a journey, and Western and Eastern North American experiences highlight that results can vary; staying patient and consistent yields the best outcomes. The guide below summarizes key steps for quick reference.
- Collect fresh cones in autumn and remove seeds from ripe cones.
- Clean seeds to remove pulp and debris.
- Stratify seeds in a refrigerator at 1-4°C for 60-90 days with a moist medium.
- Plant in a well-draining, high organic matter potting mix, burying seeds about 0.25 inches deep.
- Place in full sun; maintain damp but not soggy soil; mulch around the base after germination.
- Water deeply in the first year, prune as needed, and monitor for pests like bagworms or spider mites.
- Consider slow-release balanced fertilizer in early spring for new growth; adjust irrigation with seasons.
In terms of propagation, seeds are the main method, though cuttings can be attempted. For cuttings, use semi-hardwood material, remove lower leaves, and root in a well-draining mix in a greenhouse with consistent humidity. Roots typically form after a few weeks, and transplanted cuttings should be moved to larger pots once roots establish. Whether starting from seed or cuttings, Eastern Red Cedar rewards careful attention, patience, and consistent care through seasonal challenges.
Practical tips and cautions include ensuring proper drainage to prevent root rot, maintaining moisture without oversaturating the soil, and protecting young plants from extreme cold or wind until established. The journey of growing Eastern Red Cedar from seed is engaging and can be very rewarding with the right approach.
How To Germinate Eastern Red Cedar