Arugula thrives in cooler temperatures but still requires plenty of sunlight, making the transplant timing critical for strong establishment and steady harvests.
Optimal conditions before transplanting
Arugula is a cool-season crop and grows best in temperatures between 50°F to 65°F (10°C to 18°C). It can tolerate light freezes but will bolt (flowering and going to seed) quickly in hot weather. In heat, consider providing shade or using shade cloth (with around 30-50% shading) to prevent the arugula from becoming stressed and bolting prematurely. Keep the soil consistently moist and water the arugula when the top inch of soil feels dry to the touch, aiming for deep, even watering to encourage healthy root development.
Arugula prefers well-draining soil with organic matter. Prepare the soil by adding compost before planting and avoid heavy clay soils. When your arugula seedling has grown a few inches tall and developed a couple of sets of true leaves, transplant it into a 1-2-gallon container with drainage holes or into a nutrient-rich garden bed.
Transplanting strategy and timing
Transplanting should be done after seedlings reach a sturdy height with a couple of true leaves, ensuring the roots are developing well. Season matters because seed starting is really microclimate management. In the Midwest, use the season as a planning signal, not a guarantee. If nights are cold, start indoors and delay transplanting. If heat is building, water earlier in the day and protect young seedlings from harsh afternoon sun. By aligning transplant timing with these cues, you help seedlings establish in conditions that discourage bolting and encourage steady growth.
Arugula seeds are very tiny, so sowing depth matters. They only need to be sown about a quarter of an inch deep, with a minor indent in the soil to form a straight line before sprinkling overtop. Be careful when watering as you don’t want to wash the seeds away; the soil should remain moist until germination, which tends to be rapid. If you start indoors or use a seed-starting kit, ensure steady moisture and warmth to keep germination on track.
Where to transplant
Transplants perform well in a 1-2-gallon container with drainage or a well-prepared garden bed. Ensure the bed has loose, well-draining soil with adequate organic matter. A row cover can help protect young transplants from flea beetles and other pests during early establishment, particularly in spring.
Care after transplant
After transplanting, provide consistent moisture to prevent stress and bolting. Maintain temperatures in the cool range (50°F to 65°F / 10°C to 18°C) for best growth. Arugula appreciates full sun to part shade, with 6+ hours of sunlight per day, but in warmer periods, some afternoon shade helps reduce heat stress and bolting risk. Fertilization is generally light since arugula benefits from soil with good organic matter and background fertility; avoid heavy applications that can promote rapid growth and bolting.
Watch for pests such as aphids and caterpillars. Use least-toxic controls like neem oil or employ trap crops such as radishes to minimize damage while keeping edible greens safe for harvest.
Harvesting and ongoing production
You can start harvesting arugula leaves when they reach a usable size, usually around 2-3 inches long. Pick the outer leaves first, leaving the inner ones to continue growing. Remember that arugula is a fast-growing annual green, and its flavor is best when harvested young. For ongoing production, sow succession patches every couple of weeks, especially in cool seasons, to maintain a steady supply and prevent overcrowding of plants that can lead to bolting.
If seeds are allowed to mature, flowers and seed pods appear, and the edible flowers are peppery like the leaves. Bolting is more common in warm weather, so timely transplanting and shading strategies help postpone bolting and extend the harvest window.
Supporting options and practical tips
Seeds In A Cup® grow kits pair non-GMO arugula seeds with premium potting soil, a recyclable planter, and a humidity dome lid to help beginners keep conditions consistent. A simple starting point is the Seeds In A Cup® Arugula Grow Kit, designed for people who want the satisfaction of growing from seed without assembling a full seed-starting setup. If you end up thinning seedlings, nanible leaves can be used in salads or as garnish.
Arugula can be grown in gardens or containers, and perennial varieties may reappear each spring in suitable climates. Wild arugula (Diplotaxis tenuifolia) tends to have more serrated leaves as they mature, while cultivated annual arugula (Eruca sativa) usually has rounder leaves and a milder flavor. Annual varieties bolt in hot weather, but with careful timing and microclimate management, you can enjoy a long harvest window.
Succession planting in late summer or early fall extends the harvest into cooler months, and arugula can even overwinter in mild regions. If you’re thinning or harvesting, use a sharp tool to cut leaves at the base, leaving the plant to regrow. For interior gardening, arugula is also a good crop for sprouts and microgreens, and germination tends to be quick when soil temperatures are in the optimum range.
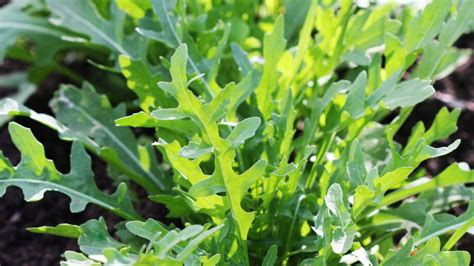
9 Tips to Grow Arugula from Seed to Harvest
In summary, transplant arugula seedlings once they are a few inches tall with true leaves, into well-drained soil that has been enriched with compost, and protect the young plants from heat and cold extremes as needed. Ground or container plantings should reflect cool-season timing, adequate moisture, and partial to full sun, with shading when heat threatens to induce premature bolting.
tags: #when #to #transplant #arugula #seedlings