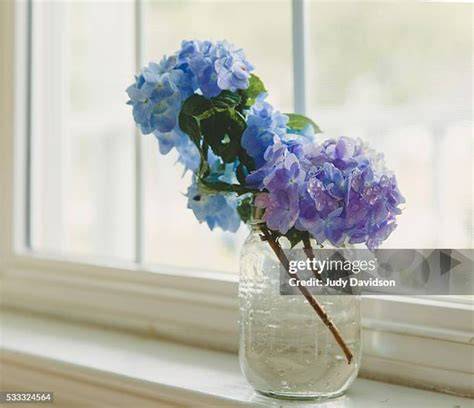
Hydrangeas are basically a big balls filled with little flowers. Therefore, the main shape of these flowers is a circle! Then inside of the circle, you paint little 4-5 petal flowers and vary your colors with white. Hydrangeas are not only a beautiful summer bloom, but are so easy and fun to paint in acrylics on canvas. Painting hydrangeas is really about creating shapes and repeating the same stroke over and over again and then changing paint colors. The window in this painting reminds me of the hot cocoa window painting I did last December! Perhaps it is the same window, although we cannot see any trees outside. To keep things simple, we only see a glare on the window in this window painting and nothing outside. However, you can choose to paint some trees or something outside if you want to go a little more advanced!
Materials
Materials include: 11 x 14 Canvas, Acrylic Paint (Titanium White, Burnt Umber, Medium Magenta, Dioxazine Purple, Cobalt Blue, Cerulean Blue, Hookers Green Hue, Permanent Light Olive Green), Brushes (3/4” Flat Wash Brush, #6 Shader, #2 Round, #0 Round, 4 Round, optional #8 Filbert), Chalk for drawing, T-Square Ruler, Pencil, Circles to trace (about 3.5” diameter), and optional Mason Jar traceable. Also: Water and paper towels for dry brush techniques and blending. A simple method described uses a T-Square ruler to mark the window sill and pane lines and a dry brush to create the mason jar’s glass glare. If you need a ready-made mason jar guide, you can download a traceable library.
Overview and approach
This tutorial breaks hydrangea painting down into simple, repeatable shapes and steps. Hydrangeas are built from overlapping circles representing the flower clusters, filled in with many small four-petal flowers, using white mixed with pinks and purples for variation. The background includes a window with a glare and a mason jar in the foreground to create a bright, cheerful atmosphere. The process emphasizes layering: a first color wash to establish the scene, then window and jar details, followed by hydrangea clusters and leaves, and finally glare and lettering on the jar for a finished look. We’ll use a dry brush technique for the mason jar’s glass and a tap-and-dab approach for the hydrangea petals to achieve texture and depth.
Step-by-step directions
- Paint the first layer of the canvas. Load your palette with cerulean blue and titanium white. Use a 3/4” Wash brush and double load it into both colors. Paint all up and down strokes with the blue and white so the colors blend, thinning with water. Let this base wash dry before the next step.
- Draw the table line and paint the window sill. Use a T-Square ruler to measure about 3” from the bottom, then paint a horizontal line with burnt umber and a 3/4 wash brush. Fill the rest of the area with a blend of burnt umber and titanium white to create a faux wood grain effect.
- Paint the window pane lines. Use the T-Square to define vertical and horizontal lines; paint a central vertical line with burnt umber using a small brush (a #6 shader or any small flat brush). Add horizontal lines at the 1/3 marks. Wipe the ruler as needed to avoid unintended marks.
- Highlight the window pane lines. With a #6 shader and titanium white, add white markers along the top edges of lines and slightly blend over the brown for a natural look. Some white on the left side of vertical lines enhances the highlight.
- Paint the window glare. Using a dry brush technique, dip a 3/4 Wash Brush in titanium white, wipe off, and apply vertical, scratchy strokes over the panels to simulate glare. Leave some blue visible for variation.
- Draw the mason jar with chalk. Sketch an oval for the jar opening, the rim, and the jar’s outer edges. The top is mostly hidden by flowers, so keep lines simple. If needed, erase with a wet brush.
- Draw two overlapping circles for hydrangea clusters. Trace two 3.5” circles (e.g., from a Tupperware container) that overlap the mason jar rim. Don’t complete every circle-focus on a few to start so the composition isn’t overwhelmed.
- Practice hydrangea petals. On practice paper, load a filbert brush with magenta and white to form 4-5 petal flowers; then try blue with cobalt to compare styles. Hydrangeas are built from many tiny flowers with variations of color-pink, white, and blue work well.
- Apply the hydrangea technique to the canvas. Use the round brush for all petals. Begin with a magenta-and-white circle, fill with little flowers and dots, and let some blue show through. Add two more overlapping circles for purple hydrangeas using dioxazine purple with white for variation. Define edges sharply where triangles meet to give the flowers a crisp look.
- Paint the stems. Use a #4 Round Brush with Hooker’s Green Hue and Light Olive Green. Double load with dark and light greens to paint simple vertical, diagonal, and curved lines from the flowers toward the jar. Much of this will be covered by glare later, so keep it light.
- Paint the leaves. Start with Hooker’s Green for leaf shape and base color, then add light olive green for a second coat to introduce color variation. Paint four leaves total and emphasize serrated edges to mimic real hydrangea foliage.
- Outline the mason jar. With a #2 Round Brush and titanium white, outline the jar’s rim, sides, and base. Then loosely outline sections with cobalt blue for the glass depth.
- Paint the glare on the jar. Use a dry brush method with a #4 Round Brush and titanium white to paint several bright glares on the jar, including a highlight on the left and a brighter one in the middle. Overlap with stems when possible for realism.
- Write the word on the jar. Freehand or lightly sketch first with pencil; then go over with a #2 Round Brush using cobalt blue mixed with a touch of white to form letters.
- Paint leaf lines. Use a #6 Shader (edge) or a #2 Round to add midline and outward diagonal lines on leaves. Mix titanium white into olive green for lighter veins.
- One final touch. Add a leaf on the ledge with chalk and fill with Hooker’s Green, plus some white on the lower half for depth. Paint a subtle shadow under the jar and leaf to ground the composition.
The technique highlights that hydrangeas are essentially circles filled with tiny four-petaled flowers. The petals can be created by stamping with a brush or by drawing petals individually with a round brush. The palette can be varied to create pinks, purples, blues, greens, and whites, and the vase and window provide context and contrast to the vibrant flowers.
Additional techniques and tips
- Try tracing circles for hydrangea globes to keep the layout balanced, then place individual flowers on top.
- Experiment with different brush types-filbert or round-on petal edges for varied shapes.
- Keep some background blue visible through the flowers for depth and luminosity.
- Use dry brush for glass glare and a soft edge to create a believable jar and window reflection.
- Mix greens in varying shades for stems and leaves to achieve natural variation.
Optional variants and extensions
For more depth, you can paint trees or outdoor scenery outside the window, though this tutorial keeps the focus on hydrangeas in a mason jar. Another variation is to stamp hydrangea petals with bubble wrap, cutting circles from bubble wrap, painting them, and pressing onto the canvas to form globes before adding individual petals with a brush or Q-tips. This creates a looser, more textural effect while maintaining the recognizable hydrangea shape.
EASY!! HOW TO PAINT HYDRANGEAS ~ STEP BY STEP PAINTING TUTORIAL
Color and technique notes
The color palette can include Magenta, Dioxazine Purple, Cobalt Blue, Cerulean Blue, Hookers Green Hue, Permanent Light Olive Green, and Titanium White. Mixing white into blue tones creates lighter pinks and purples, while leaving some blue underlayers adds depth to petals. The “glare” technique uses a dry brush with minimal paint, creating the illusion of glass in the mason jar and window panes.
Hydrangea petals can be built up by layering tones from darkest to lightest, using three tones per flower: a darkest for the base, a medium for mid-tone shading, and a light color for highlights. The leaves benefit from veining by incising into wet paint with the end of a brush or a toothpick to simulate realistic texture.
Note: You can adapt the scale by choosing larger or smaller circles for the hydrangea globes and adjusting the canvas size accordingly.
Table: Quick reference for colors and brushes
| Element | Colors | Brushes |
|---|---|---|
| Background wash | Cerulean Blue, Titanium White | 3/4” Wash Brush |
| Window sill & lines | Burnt Umber, Titanium White | #6 Shader or small flat |
| Hydrangea petals (magenta) | Medium Magenta, Titanium White | Round Brush or Filbert |
| Hydrangea petals (blue) | Cobalt Blue, Titanium White, Ultramarine | Round Brush |
| Leaves | Hookers Green Hue, Permanent Light Olive Green | #4 Round |
| Jar outline & glare | Titanium White, Cobalt Blue | #2 Round, #4 Round |