You grab the cord. Pull. Nothing. Just a frayed rope dangling in your hand and a completely dead engine. A professional repair runs $60-$150. But if the pull cord is your only problem, you can fix it yourself in 30 minutes for around $15. Replacing a lawn mower pull cord is a simple DIY repair that takes 30-60 minutes. Most homeowners can complete it for $15-$50 in parts, compared to $60-$150 in professional labor.
You disconnect the spark plug, remove the recoil housing (2-4 screws), unwind the broken cord, and thread in new nylon rope. This guide walks you through exactly what causes pull cord failure, how to diagnose it in 5 minutes, and then gives you full step-by-step instructions for both repairs: rope-only replacement (the easy one) and spring plus rope replacement (when the spring gives out).
What Causes a Broken Lawn Mower Pull Cord?
- Frayed or Snapped Nylon Rope (Most Common - 70%)
- Recoil Spring Fatigue (20%)
- Rope Installation Error (10%)
- Pulley or Wheel Damage
- Housing Cracks
How to Diagnose What’s Actually Broken
Step 1 - Disconnect the Spark Plug Wire
Step 2 - Inspect the Rope End
Step 3 - Check the Recoil Housing for Cracks
Step 4 - Try a Slow Test Pull
DIY Path 1 - How to Replace the Pull Cord Only (Easiest, 30-60 Minutes)
Tools You’ll Need
- Needle-nose pliers
- Scissors
- Rope, nylon starter rope - .155″ diameter (standard for most walk-behind mowers); buy a 100-ft spool and cut to length (usually 8-10 feet per cord)
Parts You’ll Need
- New pull cord (8-10 feet, typical)
Step-by-Step Instructions
- Disconnect the spark plug wire. Pull the rubber boot straight off the plug.
- Remove the recoil housing. Look for 2-4 screws holding the housing to the engine. On most Briggs & Stratton and MTD engines they’re Phillips head; on Honda GCV models they may require a small socket. Take a photo of the housing position before removal. Set the screws in a cup or magnetic tray - losing them is annoying.
- With the housing off, take a quick look at the spring: if it’s intact and under tension, great. Unwind the broken rope from the pulley. Note the winding direction - on most mowers it’s clockwise when viewed from the front of the housing. Remove the old rope entirely.
- Cut and seal your new rope. Measure about 8-10 feet from the spool (for a standard 21″ walk-behind). Cut cleanly with scissors, then touch each cut end briefly to the lighter flame - 1-2 seconds - until the nylon melts slightly and seals.
- Feed the rope through the pulley and wind it. Thread one end of the rope through the starting hole in the pulley. Wind the rope around the pulley 4-6 times in the same direction you noted in Step 3 (typically clockwise). Feed the rope through the housing exit hole.
- While holding slight tension on the wound pulley, feed the hanging end of the rope through the hole in the housing face. Install the handle. Option A: Thread the rope through the pre-made T-handle, pull 3-4 inches through, tie a tight overhand knot, and melt the knot end lightly with the lighter to lock it. Option B: Tie a large overhand knot directly and melt it.
- Reassemble the housing. Position the housing back on the engine, making sure no rope is caught between the housing and engine block. Test the pull. Pull the cord gently 3-5 times. It should unwind smoothly, retract cleanly, and feel firm without requiring a grunt.
- If it jams: stop, remove the housing, and check for rope kinks or tangling around the pulley. If it won’t retract: check winding direction and spring condition.
That’s it. On a warm day with everything laid out, this whole job takes about 30 minutes, including the time to track down your screwdriver. If your test pull revealed no spring tension at all, or if your rope keeps coming out without retracting, the spring is the real problem. Don’t just replace the rope - it won’t fix anything, and you’ll be back here in two weeks.
You have two options here: buy a pre-assembled recoil starter kit specific to your engine, or buy an individual spring and rope and assemble it yourself.
Pre-assembled recoil starter kit (model-specific) - $25-$75 on Amazon or from a parts house. Look up your engine model number (stamped on the engine block) to get the right kit. For Briggs & Stratton engines, part numbers 591734 and 499706 cover a wide range of common models. For MTD, 753-08173 and 753-08209 are the most common.
⚠️ Safety Warning - Recoil Spring Tension
The recoil spring stores mechanical energy. Even an “old” or “weak” spring can snap free unexpectedly during removal and cause serious eye or hand injuries. Always wear eye protection before removing or handling the recoil spring. Work slowly, never force the spring, and keep your face away from the spring housing during disassembly. If the spring suddenly pops free, do not attempt to catch it - let it go, locate it on the ground, and retrieve it calmly.
Disconnect the spark plug wire. Remove the recoil housing and photograph everything. Before removing any spring components, take a clear photo of the spring’s anchor points in the housing and at the pulley. This is your assembly reference. The spring has a fixed end (anchored to the housing) and a free end (anchored to the pulley or pulley hub).
Carefully remove the old spring. Using needle-nose pliers, gently lift the spring’s free end off its anchor point first, then work the fixed end loose. The spring may still be under partial tension even if it’s weak - hence the eye protection. If it’s corroded or seized, work slowly and use the flat-head screwdriver to gently pry it free. Inspect the pulley and housing interior. With the spring out, look carefully at the pulley for cracks, worn flanges, or sharp edges. Run your finger along the inside of the housing to check for burrs that might fray the new rope. Sand down any rough spots with fine-grit sandpaper.
Install the new spring per the kit instructions. Most kits include a printed guide; follow it over my general instructions if they conflict - the kit is specific to your engine, this guide is general. Typically: anchor the fixed end in the housing slot first, then carefully position the coil, and hook the free end onto the pulley hub. The spring should curve smoothly in a consistent spiral without kinking. Wind and install the new rope. Follow Steps 4-7 from DIY Path 1 above. Reassemble the housing. Position the housing carefully - make sure the spring isn’t pinched between housing and engine, and the rope runs cleanly through the exit hole. Snug up the bolts. Test slowly. Pull gently 3-5 times. A properly installed spring should retract the rope smoothly and fairly quickly - within 2-3 seconds of release.
If the rope hangs out: the spring may not be anchored correctly at the pulley end. If the rope is extremely stiff and barely moves: you may have wound it too many times or the spring tension is too high - try removing one wind from the pulley. For Toro and Honda GCV120/GCV160 owners: these engines sometimes have the recoil assembly positioned differently than typical Briggs & Stratton units. On Honda GCV models, the housing bolts are often recessed and may need a 10mm socket. The spring mechanism is otherwise similar. If anything feels wrong during spring installation, stop and consult the kit instructions or a YouTube tutorial for your specific model before proceeding.
Most pull cord problems are DIY-friendly.
What does professional repair cost?
Parts plus labor typically runs $75-$200 total, with a 1-2 day turnaround. Before dropping the mower off, call a local shop for a free diagnosis quote - many will give you an estimate over the phone. Some will even walk you through a simple rope replacement on the spot if you bring the mower in. If your mower won’t start even after the pull cord is fixed, the issue could be fuel, spark plug, air filter, or carburetor-related.
Here’s what this repair actually costs - and how it compares to handing it off to a shop. Plus same-day turnaround vs. Unless you need to buy a full tool set, a rope-only fix costs under $15 out of pocket. Even a full spring replacement runs $30-$50 and takes 60-90 minutes - versus paying a shop $100+ and waiting days.
Even when you follow the steps, things can go sideways. Cause: Too many winds around the pulley, or wound too tight. Standard is 4-6 wraps. Fix: Remove the housing, unwind one or two loops from the pulley, reassemble, and test again. Fix: Remove the housing and reposition the rope so it runs straight from the pulley through the exit hole without any angle. Cause: Weak or incorrectly installed spring, or the rope is wound in the wrong direction. Fix: If it’s a new spring that isn’t retracting, re-open the housing and verify both anchor points against the kit diagram. Cause: The pulley has a crack or sharp burr that’s cutting into the rope on every pull. Fix: Pull the housing and inspect the pulley closely. Run a finger around the rope channel looking for sharp edges. Sand down any burrs with fine-grit sandpaper, or replace the pulley entirely if it’s cracked. Cause: The pull cord is working fine - the problem is something else entirely. Fix: Don’t assume the cord repair failed. If the cord pulls smoothly and retracts properly, your recoil system is good. Start diagnosing the starting system: check the fuel (old gas is a very common culprit), inspect the spark plug for fouling, and make sure the air filter isn’t clogged.
Maintenance tips to extend pull cord life:
- Store under cover. UV and moisture are the two biggest enemies of nylon rope.
- Pull smooth, not jerky. Sharp yanks create more friction and stress on the rope than a firm, steady pull.
- Winterize the recoil system. Wind the rope fully and hold it in for storage to pre-tension the spring.
- Check the pulley annually. Every spring, before the first mow of the season, pull the housing and run a finger around the pulley channel.
- Use .155″ rope. Don’t substitute thinner rope to save a dollar.
For a broader approach to lawn equipment maintenance, our Complete Guide to Vintage Equipment Restoration covers the maintenance mindset that keeps older machines running for decades. Occasionally the honest answer is: don’t fix the pull cord. If the mower deck is damaged, consider other steps.
When It’s Worth Replacing the Mower Instead
If the mower deck is worn or major components are failing beyond a simple pull cord issue, it may be time to replace the mower rather than investing in extensive repairs. Ready to fix that pull cord?
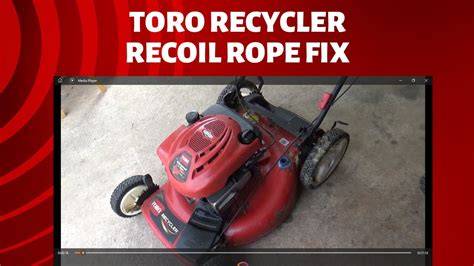
How to Replace Pull String on Toro or Briggs Stratton Lawn Mower & Craftsman Starter Recoil Cord
Frequently Asked Questions
- Why won’t my lawn mower pull cord retract after I pull it?
- How long does it take to replace a lawn mower pull cord?
- How much does it cost to replace a lawn mower pull cord?
- Can you repair a frayed pull cord, or do you need to replace it?
- When should I call a professional for pull cord repair?
Why the Toro-specific note matters
Toro models often follow the general recoil principles described here, but some Toro engines have their recoil assemblies positioned differently, and certain model kits are recommended for quick replacements. Always reference your specific engine model number to choose the correct kit or parts.